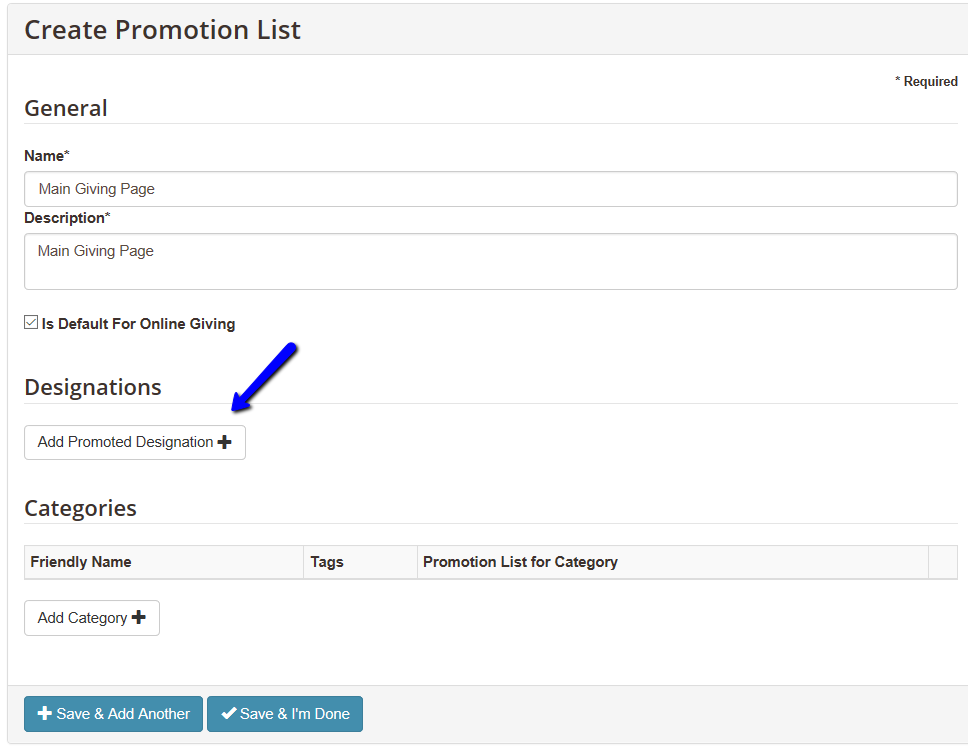
Steps to create and Organize your online giving promotion list
In Vision2, promotion lists are used to manage your online designations.
To create and configure your promotion list
-
Login to V2 admin portal and navigate to: Marketing > Promotion Lists > Add

-
Provide a Name and Description for your promotion list
-
Select the Is Default for Online Giving checkbox if this is your primary promotion list

-
Under the Designations section, click the Add Promoted Designation button

-
In the Promoted Designation search box, search for and select the designation you wish to add

-
In the Sequence text box, type the order number you want the designation to appear on your website. For example: If you want the designation at the top of the list, type a 1 in the text box
-
The Short Description text box is pulled from the designation’s short description section on the Finance tab
-
Continue to add and order your promoted designations for this list
-
Click Save & I’m Done
To preview your promotion list
-
Login to the V2 admin portal and navigate to: Web > Giving > Search and Browse
-
In the Widget Container Optional Settings list, click to enable the switch next to DisableSearch
-
Click to enable the switch next to Promotion List
-
Search for and select your promo list
-
Scroll down the page to the Widget Preview section to see how your list will appear on your website
